|
Rename audio files |
  
|
|
Rename audio files |
|
Use the Auto-Organize function to automatically rename audio files attached to your database. The file and folder names are generated based on information in the database (not the tags!) according to the format you specify. For example, you can organize your audio files following this format: C:\My Music\<Artist>\<Album title>\Track # - Title.
| 1. | Choose Auto-Organize from the Audio menu. You see the 'Auto-Organize Audio Files' window. 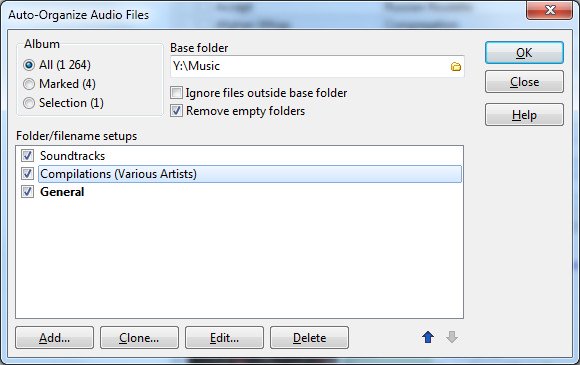 By default there are three setups: Soundtracks (all soundtracks - the audio files will be saved in a separate folder named !Soundtracks), Compilations (all compilations - the audio files will be saved in a separate folder named !Compilations) and General (the rest of the albums). |
| 2. | Select whether you want to auto-organize all albums, the marked albums, or the selected albums in the browse list. |
| 3. | Specify Base folder. The folders containing the audio files will be created below this folder. |
| 4. | The Folder/filename setups list shows the various folder/filename setups. Each setup is associated with a filter. All albums matching this filter will use the specified folder and filename setup. Albums that doesn't match any of the filters will use the "General" setup. The various setups are processed in the order they are shown in the list. To create a new setup, click the Add button. To clone the selected setup, click the Clone button. To edit the selected setup, click the Edit button. This will open the 'Add/Edit Folder/Filename Setup' window. 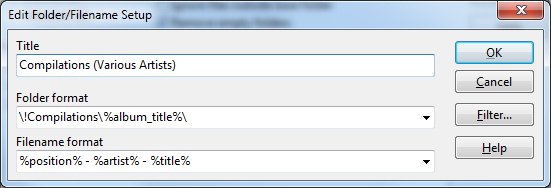 |
| 5. | In the 'Auto-Organize Audio Files' window, click the OK button to start generating the new file and folder names. |
| 6. | You see the 'Auto-Organize Audio Files - Preview' window. Please review the new file and folder names carefully before you continue. Files and folder with a new name are highlighted in bold. Note: The program has not yet actually renamed any files or folders. |
| 7. | Click the OK button to start the reorganize process. Click Yes to confirm that you want to rename the files. Wait while the program reorganizes your audio files. |